Showing posts with label paint. Show all posts

Saturday, December 17, 2016

House Project #10: The Bathroom

The smallest (almost) room in the house and it's taken me the longest to decide on paint colors. I don't love the current bathroom layout, but it's functional. I have a vision of what I'd do if I came into enough money to renovate it (this being enough money to take care of alllll of the other things that are priority over simply tidying up the space!), but that vision is unlikely to become a reality any time soon, so painting is the only option.
boooorrriiing renters white with stained wood cupboards
you can see the old electric water heater in the lower right;
it was never operational, so I had the electrician remove it

Sunday, November 30, 2014

Furniture Face-lift: Dresser and Jelly-jar shelves

A coat of paint can make a world of difference for some pieces of furniture. And, when the local hardware store sells paint returns for pretty cheap; most gallons are $5, and most quarts are $1, I'm usually not too picky about the colors I'm getting for cheap.

Luckily I've scored some decent colors (I am kind of picky!), and earlier this summer found a gallon of light gray and quart of purple. I used the gray as a primer coat on the front door I scored, mainly to cover up the red that doesn't quite go with the house color. The door still hasn't been hung, but we're getting closer.

There are two pieces that needed a little face-lift now that the two rooms have been painted: my dresser, and a shallow shelf that is going to go in the guest croffice. The gray was perfect for both pieces and against the room wall colors, and the purple was a good accent against the gray for the dresser

House Project #7: Back Bedroom

I finished painting the back bedroom just before Thanksgiving. I was house sitting through the holiday, so could leave the place in a bit of shambles (sorry sister!). From the look of the living room last week, you'd have thought I was a hoarder. There was a bit of a path here and there, and boxes and tubs and furniture all over the place. Of course, looking into the two rooms getting painted showed they were nearly empty, negating any hoarding fears.
Here's the room when I moved in. Curtains are long gone, and the cover of the
baseboard heating unit has been straightened

Wednesday, November 19, 2014

House Project #6: Front Bedroom and Guest Croffice

Back before my sister moved in at the beginning of September, I painted the room she's living in.
Front room, prior to moving in; the drapes are long gone - I put up a mini-blind
and added new curtains.

Sunday, August 10, 2014

Kitchen/Dinning Area Update

I have a minor obsession with vintage Pyrex and have slowly been acquiring random pieces over the years. I definitely use some of them, especially at the holidays or when going to potlucks, but quite a few have been tucked away in cupboards, unused and unseen. I love the patterns and have been debating adding a shelf to the kitchen/dinning area to display the pieces.

Earlier this summer I grabbed a board from the collection of wood left in my dad's barn. It's a 1 x 8, about 6 1/2 ft long. The brackets are 6 inches on the short side, 8 on the long side. The board was primed already, and I wanted it to match the rest of the space so I added a few coats of the cupboard and trim paint. The board was sitting in the garage for a few weeks until I finally got motivated Friday night and Saturday morning. On Friday night I initially hung the brackets too high, so Saturday morning I started over. A little measuring, leveling, and drilling, and the shelf is up!

Monday, July 28, 2014

This & That: Catching up and Making plans

still getting strawberries!
It's been a busy month; I've been working most days, had a friend visit for a weekend mid-month, and just this weekend attended a wedding of a friend/coworker. It's a rain day from work (like a snow day, but for gardener's in the summer), so I'm trying to motivate to get some things done, or at least organized. I haven't been very crafty lately - it's hard with the weather being so nice, and there being plenty to do in the yard (lots of free plants from work!), and the loooong list of house things I should/want to be doing. At the very least, here's a little update of craft & house projects I have been working on (or plan to be!).

Sunday, April 20, 2014

House Project #5: The Living Room

It's been a while since the last major house project, in which I painted the kitchen. I didn't do much over the winter aside from assorted curtains and hanging some pictures and paintings. Well, I'm delighted to report that I've finished painting the living room! This is the other third of the main room of the house. One third is the kitchen and the other third is the reading nook. I wanted to get this main space finished since this is where I spend most of my time, be it alone or entertaining.
the "front" half of the living room. great light! terrible carpet & drapes.

Friday, February 14, 2014

Fruity Wall Art

Remember Crafternoon in Driggs? While on a ski vacation to Driggs to visit some college friends, I went a little crazy with my friend K's watercolors and made a slew of fruit & veggie-themed cards. I've since used most of them (it was three years ago, after all . . . wait, THREE years? Eesh, time flies!), but had a few still in my card collection. This year I've (kind of) committed to slowly working my way through my stock of craft supplies, and so I decided to turn a few of the leftover cards into wall art with the help of an 8x10 canvas I also had on hand.

Tuesday, November 26, 2013

House Project #4: The Kitchen! & Kitchen Cupboards, Part II

As many of you know, I teach at a ski academy here in Vermont. Over the last few years I've gone to Colorado with the Alpine kids when they travel for their November on-snow camp. This year I didn't end up going - a bit of a disappointment, but also a chance to get a few projects done. I switched over my seasonal clothes, I sorted and rearranged the guest croffice, I organized the mancave, and I took on the kitchen.

I had already painted the inside of the cupboards, back when I first moved in, but needed a chunk of time to finish the exterior of the cupboards, and to update the rest of the space. Cue several weeks sans-students, mix in some Australian series' on hulu, and voila, a mostly finished kitchen/dinning room. The walls are a really nice blue, called harbor haze (a nod to my five years on the island), and the trim is the same woodland snow seen in the laundry room and reading nook. The handles on all the cupboard doors and on the drawers were spray-painted with several coats of semi-gloss black.

This space had the most amount of work that has needed to go into it prior to painting. Two of the walls had wallpaper, the cupboard doors and handles all needed to come off, a hole or two needed patching, and there was some scary crap under the stove. All of the cupboards and trim in the house is stained wood, so it all needs several coats of stain-blocking primer before painting. I've given the trim all several coats of the primer, and at least two coats of the trim paint although I may go back with a third and fourth coat as I'm noticing the dark still coming through in some areas. I also realized half-way through the first coat of the wall color that they had painted over a layer of wallpaper at some point. Someday if I get really ambitious I'll redo the walls, but for now it came out pretty nicely.
kitchen, pre-move-in: stained-wood cupboards, flowered wallpaper & a plaid valance

Saturday, November 23, 2013

House Project #3: Reading Nook

This corner of the room is at the front of the house, to the left of the front door once you've entered. For the time being, the space is a combination of a reading area and the "mudroom." I wanted a space to hang coats and leave shoes without having to go all the way to the back room (and entering around the back of the house doesn't make a lot of sense right now), and a space for most of my books, a table with some plants, and an armchair from my granddad's house.
pre-move-in. note the lovely drapes, circa 198? and up for grabs to the lowest bidder

Friday, November 22, 2013

House Project #2: Laundry Room

The entire house is renter's white. At least, that's what I'm calling it. It's an ugly white, and one that seems to show EVERYTHING. And it has to go. So I slowly started to cover it up with much warmer and happier colors.

As the end of October neared, and I was running out of patience waiting for the closing, I decided I needed to paint something other than furniture. I had already decided on a color for the laundry room, and ended up getting the paint on sale. Of course, the paint chip I had was from a different company than the paint that was on sale, but I really love the color I ended up with.
the only "before" shot I think I have of this space.
non-descript and fairly blah. opposite the window is the
room-wide pantry cupboard!

Friday, November 15, 2013

House Project #1: Kitchen Cupboards, Part I

I meant to post this back in September, but forgot. . . and then remembered when I started working on the rest of the kitchen today, so here it is!

House Project #1: Kitchen Cupboards, Part I

I was lucky to be able to move into my house before it was really mine. The first thing I did was to paint the inside of the kitchen cupboards. They weren't in terrible shape, but vacuuming and wiping them down didn't seem like quite enough to rid them of that "four years of renting" feeling that the house was emitting when I first moved in.

The interiors were a mustardy yellow, and had 80s-vintage contact paper on most of the shelves - some flowered, some yellow. Not terribly ugly, but not the décor I'm going for here. I had pulled the contact paper out of the cupboards on the right side of the kitchen before I took the pictures, then realized I needed to capture its awesomeness before taking it all out.
cupboard above the fridge

Thursday, September 19, 2013

Furniture Facelift: Low Bookshelf Edition

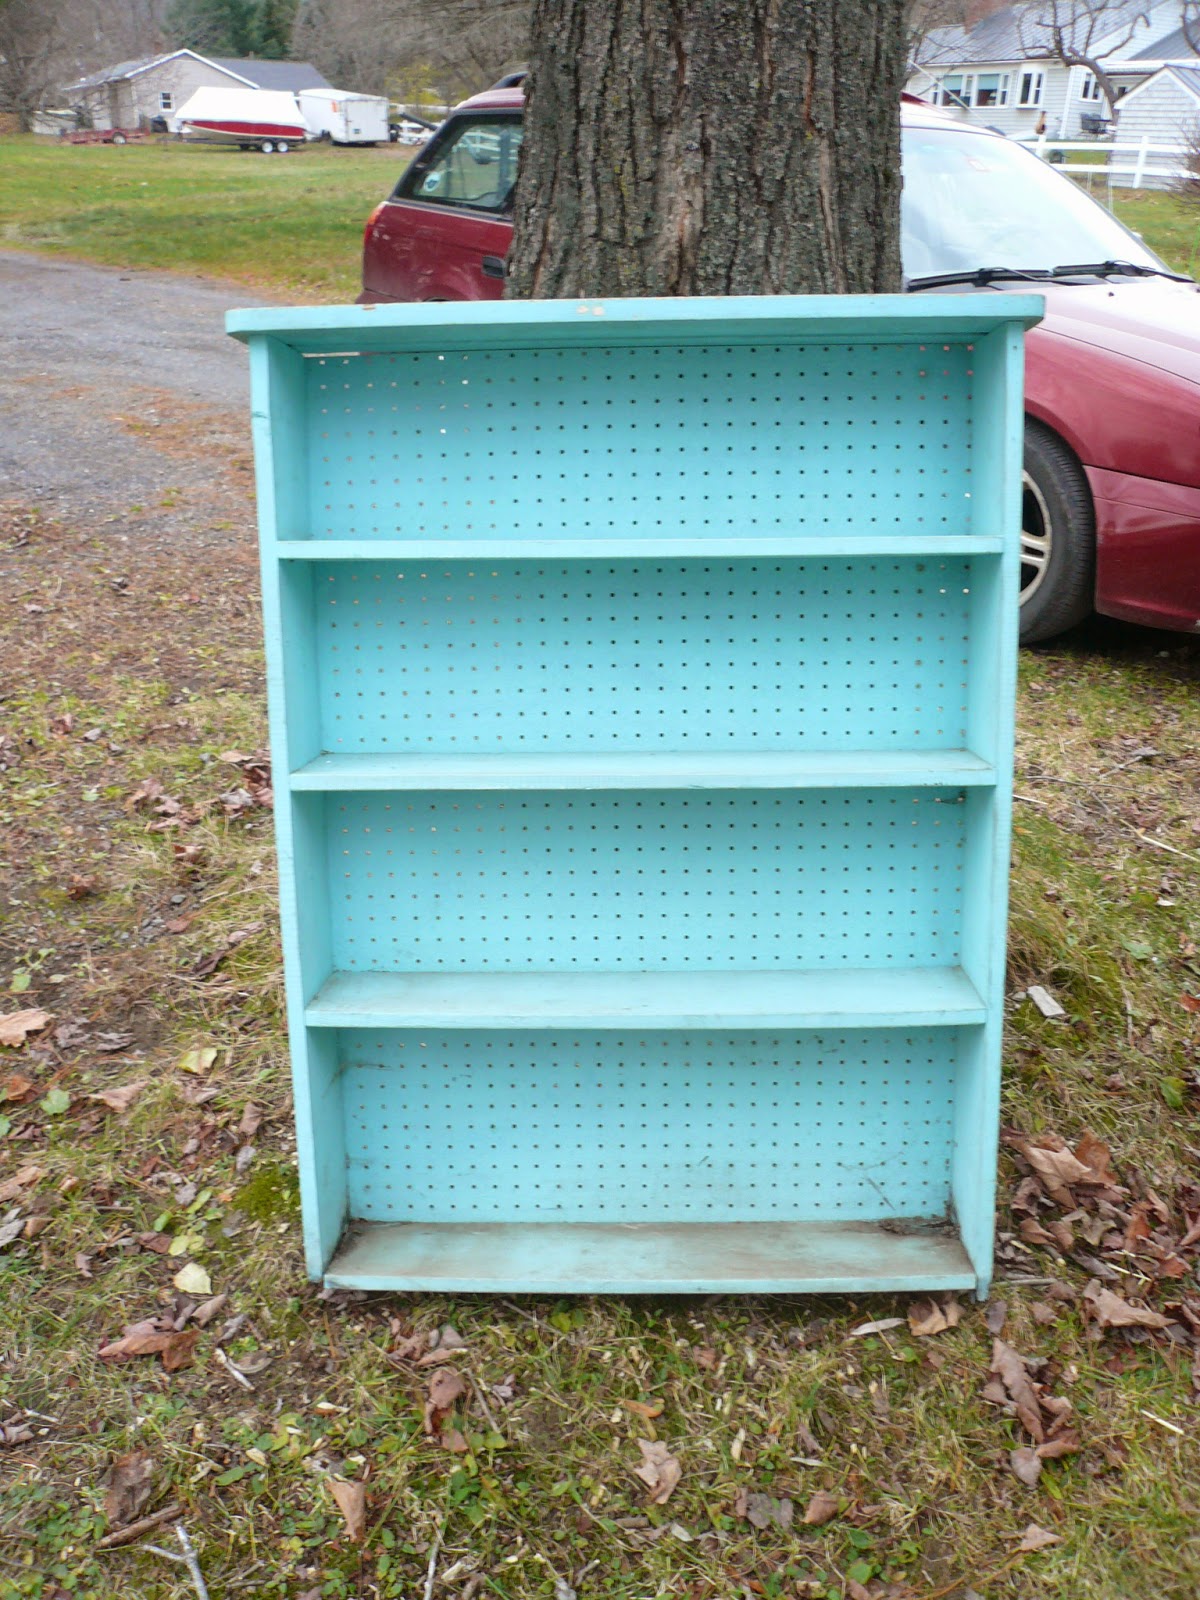
Another free score for the house! This bookshelf, like the hutch from a few posts ago, only needed a couple of coats of paint to make it room-ready. My dad did replace the back, although it didn't necessarily need it. Not a huge deal when it comes to getting free stuff, right? The story behind the shelf, however, is pretty neat.

First, painting the shelf.
bookshelf, with new back (courtesy of dad)

Monday, September 9, 2013

Furniture Facelift: Hutch Edition

I'm all about bargain & thrift shopping, especially now that I've (almost) got a house. Earlier this summer I swung by the ReStore in Burlington to window shop for furniture for the impending move. I hadn't planned on buying anything, but when I saw this piece, I knew immediately that it would be a perfect kitchen/dinning room piece. A little elbow grease got the grime off it - of which there was quite a bit. Word to the wise when donating things to thrift stores/etc.: at least try to scrub off the grime before you drop it off. Nobody wants to scrape that junk off. 
little hutch. so much potential.
(it was a bit on the cheap-looking side. trust me.)

Thursday, March 28, 2013

Make-Something-Monday: DIY "Sea glass" bottles

Update/Disclaimer: I have been getting a lot of views of this post, probably since folks think they might actually get instructions on how to make the very bright and pretty mason jars seen in the image going around the 'net. I never could get the original link to work, and I'm fairly certain that those jars were manufactured, not a D.I.Y. project. Correct me if I'm wrong, and enjoy our project!


A friend had pinned an image with a caption that claimed a how-to for making jars look like "sea glass" using Elmer's Glue and food coloring. As luck would have it, the link didn't work - the server (or whatever fancy website-blocking software) here at school blocked it. I should probably be thankful, since it very well could be a bogus, porn/virus-filled link, despite the really pretty jars. But if you've seen this pin, and the link works, let me know. Maybe it's legit (or possibly even too legit to quit).
 LEFT: the alleged "sea glass" jars        RIGHT: the "sea glass" jars we made
      circulating the world of Pinterest             after reading several how-to's

So I went to the Google and did a little search, and of course came up with a ton of hits. There are a lot of crafty blogs linking this idea. Most of the pics look less like "sea glass" - which I picture as being somewhat frosted in appearance - and more like colored/tinted glass. Creative nonetheless.

Saturday, January 29, 2011

Furniture Facelift: Two Sidetables & an Ottoman

say no to crack
About a month ago I found a a small ottoman at the swap shop. Aside from the cracked seat, it was in good shape; it even has wheels for ease of moving it around the apartment! I didn't really need it (I don't really need anything from the swap shop), but I knew it would make a great foot rest for the arm chair, and the cats clearly need another object to sit on.


When I brought it home, I promptly put it in my neighbors empty apartment until I could find time to do something to make it slightly less ugly, or at least a little more comfortable. No one wants to sit on a cracked seat. Knowing I needed to give this seat a face lift reminded me that I should finally get around to giving a couple of side tables that I've had for a while a face lift, too. I had planned on painting them, but my apartment doesn't have a lot of space for such activities. Next door they went to wait their turn to be refurbished as well.