Showing posts with label tutorial. Show all posts

Tuesday, July 12, 2016

DIY Planter Chairs - A quick and easy project

The idea for chairs repurposed as outdoor planters came across my pinterest feed back in March, and like most things I pin, this idea gathered dust for a while before I decided to commit to it.

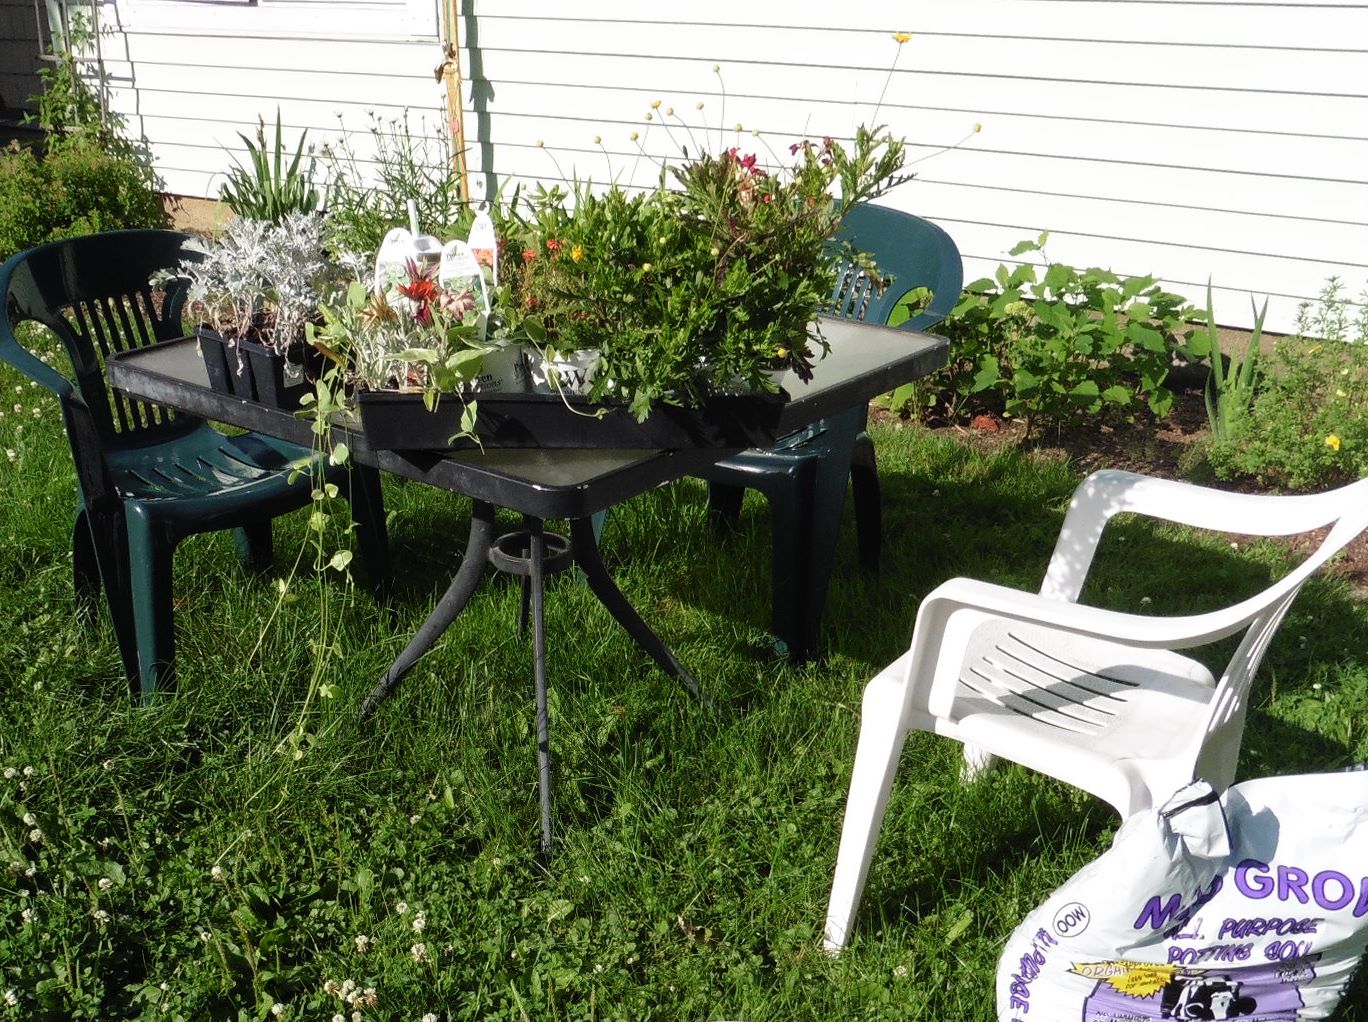
In part because annuals are on sale at most places right now, and given that I have two sets of broken-seated chairs in my garage awaiting a new life, it seemed like the perfect crafternoon activity post-work on Monday.

I had originally planned to remove the broken caning from the seats and simply drop a couple of old hanging planter pots into the openings. . . easy enough, but where's the challenge and fun in that? Not to mention that once I got the pots out and surveyed the amount of plants I had brought home, I realized that there wouldn't be quite enough space in the pots for the plants to be happy enough.
Plants!
Thing 1 and Thing 2; both seats in disrepair!

Tuesday, December 17, 2013

Make-Something-Monday: T-shirt Necklaces

It's been a few months since my sister and I got together for make-something-monday. Okay, it's been since March, but we have thought about it! We finally made a plan for last night and opted for another t-shirt-based craft.  

tri-color t-shirt necklace
I pinned the t-shirt necklace awhile ago from this site, but there are a ton of blogs out there with the same/similar craft. We're not out to reinvent the wheel here folks, just share our version of things. This is fairly quick and easy, and requires little skill beyond cutting fabric. And your cut lines don't even need to be straight!

Saturday, December 14, 2013

Christmas Cards, 2013 edition

The past few years I have been a bit ambitious and made cards with individual designs; last year was the paint-chip theme and quite a few cards were designed with the recipient in mind. The year before was a mixed bag of different designs, both catalog-collage & stamped. Back in 2010 I cut out a crazy amount of paper snowflakes that were the cover of each card (by the way - I found a dozen or so extras when I was gathering supplies for this year!). 

This year I stayed simple with two designs, and minimal prep: just folding the cardstock, punching approximately 90 little snowflakes (give or take the few that may be under the couch or that the cat absconded with) that were affixed with glue tape, and stamping.

Friday, November 15, 2013

Holiday Pregaming, Ornament-style: Clothespin Snowflakes

I generally wait until it is at least December before I get into the holiday spirit, but for the sake of a crafty blog post (which, by the way, you've already had three of this month!), and the Pintester's latest Ornament-themed Pintester Movement, it is Christmas in November!
obligatory artsy window shot
pre-snow - which has been gracing us over the past few days
here in the MRV
I'm a sucker for snowflakes, so of course I was inclined to find a snowflake-inspired ornament, and I tend towards the recycled variety, as well. Lucky for me I had a two-for-one that I'd pinned a while ago: the Clothespin Snowflake.

Wednesday, November 13, 2013

Fabric-covered Switch plates & Outlet plates

When I painted the reading nook the other weekend (pictures to come!), I had to remove three outlet plates and one switch plate. I had planned to paint the outlet covers with the wall paint, and the switch plate with the trim color, but of course I set them aside and forgot about them until after everything was cleaned up. Not that it would have been a huge deal to open the paint and do it, but I decided instead to give them a little face lift with some fabric.

the makings of a craft project:
operation update-the-plates
I wanted to stick with the blue accent I have going in that corner (the drapes are blue, as is a quilted hanging that is on the back of the chair, and a poster hanging on one wall has a bit of blue in it, too). I have a respectable collection of fabric and found a blue piece that has a bit of a celestial pattern, with lighter swirls and little stars. The fabric worked with the drapes, and looked good against the wall color, too.

Wednesday, July 3, 2013

Sweatshirt Resize

I like to refer to the token sweatshirt from my undergrad days as the "$350 sweatshirt" because I received it after mailing in the $350 deposit to hold my spot when I decided to go to Clarkson. Of course they were indiscriminate in selecting the "welcome-to-college-thanks-for-the-first-of-a-lot-of-money-you-will-give-us" sweatshirt to send to me, and consequently it is a large . . . while I am not. Luckily, the late 90s were all about over-sized clothes, so in the grand scheme of things at the time the size was inconsequential. Not to mention that I was at an engineering school where dressing stylishly didn't feel all that crucial, except during job fairs (note to current students: sweatshirts are generally not acceptable job fair attire).
the 90s are alive in this sweatshirt

Wednesday, May 15, 2013

(almost) No-sew Braided T-shirt Collar Revisited

I've been meaning to revisit the "(almost) No-sew Braided T-shirt Collar" from March of last year.  I didn't have another shirt in my closet that I was interested in altering, so I have kept my eye out when hitting the thrift stores. When I was out a few weeks ago, I finally found a couple of inexpensive T's that I decided to try this again.

When we made these the first time, we both found that the neck felt a bit tight. So, I figured that starting with a deeper scooped neck would still give the braided look without as tight a feel. The T's I picked up each have a fairly scooped neck.
round 2 t-shirt
just a bit scoopy, and not really suitable for teaching in

Thursday, March 28, 2013

Make-Something-Monday: DIY "Sea glass" bottles

Update/Disclaimer: I have been getting a lot of views of this post, probably since folks think they might actually get instructions on how to make the very bright and pretty mason jars seen in the image going around the 'net. I never could get the original link to work, and I'm fairly certain that those jars were manufactured, not a D.I.Y. project. Correct me if I'm wrong, and enjoy our project!


A friend had pinned an image with a caption that claimed a how-to for making jars look like "sea glass" using Elmer's Glue and food coloring. As luck would have it, the link didn't work - the server (or whatever fancy website-blocking software) here at school blocked it. I should probably be thankful, since it very well could be a bogus, porn/virus-filled link, despite the really pretty jars. But if you've seen this pin, and the link works, let me know. Maybe it's legit (or possibly even too legit to quit).
 LEFT: the alleged "sea glass" jars        RIGHT: the "sea glass" jars we made
      circulating the world of Pinterest             after reading several how-to's

So I went to the Google and did a little search, and of course came up with a ton of hits. There are a lot of crafty blogs linking this idea. Most of the pics look less like "sea glass" - which I picture as being somewhat frosted in appearance - and more like colored/tinted glass. Creative nonetheless.

Sunday, December 23, 2012

'Tis the season: gingerbread men and 3-D paper stars

A little round up of some baking and crafting from this week/weekend.  Despite the 3 or four inches of fresh snow that fell overnight, I took this morning to finish up procuring and wrapping presents for the family.  Zoe makes an excellent backdrop, and her patience was rewarded with an hour or so hike on some trails across from the nearby elementary school.
wrapping paper courtesy of old seven days papers.
just another way to cut down on waste during the
holidays, doubling as a great fire starter!

Sunday, December 16, 2012

Christmas Cards, 2012 edition

Another Sunday crafternoon.  It's snowing outside, "White Christmas" is on TV, and the holidays are just around the corner.

What to do with paint chip strips that have been laying around? Make Christmas cards, of course!
some paint strips

Saturday, May 12, 2012

A stitch in time: Chaco quick-fix

I love my Chacos.  I bought them when I moved to Durango back in 2004.  They've been on multiple river trips and tidepooling excursions, southwest desert and mountain hikes, northeast rambles and coastal island scrambles.  I just about live in them from mid-spring through late fall. 

floating the san jaun, june '06

Wednesday, March 21, 2012

Make Something Monday: (almost) No-sew Braided T-shirt Collar

finished braid, with rouching effect!
I came across this fairly simple idea for updating/fancifying a t-shirt: creating a braid around the neck opening using the fabric of the shirt itself. Her inspiration came from a picture she'd seen on pinterest of a Banana Republic shirt with two rows of "braid" around the front of the collar.

G came over on Monday night with Odin to hang out so we decided this might be a low-key craft to do, and it seems to be follow our current theme of t-shirts.

Wednesday, February 8, 2012

Make Something Monday: T-shirt produce bags

. . . and other updates.

A while ago, my sister and I had decided to establish a weekly crafting routine on Monday nights (my last class ends by 5, and I have the evening free from dorm-parenting duties). This weekly crafting idea comes from my friend Nicole from ME, who has been holding "Too Cute Tuesdays" off and on over the past several years. She started after she moved off the island, so I never got to be a part of them. She and her crew have made a lot of cool things over the years that I keep meaning to try my hand at (the Fabric To Go boxes I made last spring came from a craft she had posted about). Winter being winter (and colds, and lack of planning) has kept us from actually starting up. Last night (yes, Tuesday), however, we decided to get the show on the road.
old t-shirts, mostly from G

Last week I'd stumbled across a t-shirt repurposing project: turn old t-shirts into produce (or other) bags with a seam or two and some snips through the fabric to give it some extra stretch. One take on the project is here, another take is here. We mostly followed the former example.